Understanding a Map with Ordnance Survey

Maps unlock adventure. It’s as simple as that! And reading a map is easy when you know how. Ordnance Survey is the national mapping agency for Great Britain and so what they don’t know about navigation, isn’t worth knowing. We asked them to share their expert knowledge for this beginner’s guide to understanding a map.

Whilst you're here, don't miss our guide to understanding a compass, an essential part of reading and understanding a map.

Map and Compass

Contents

There is a lot to know about map reading. Navigate your way through the sections to top up your knowledge.

Maps

What is a Map?

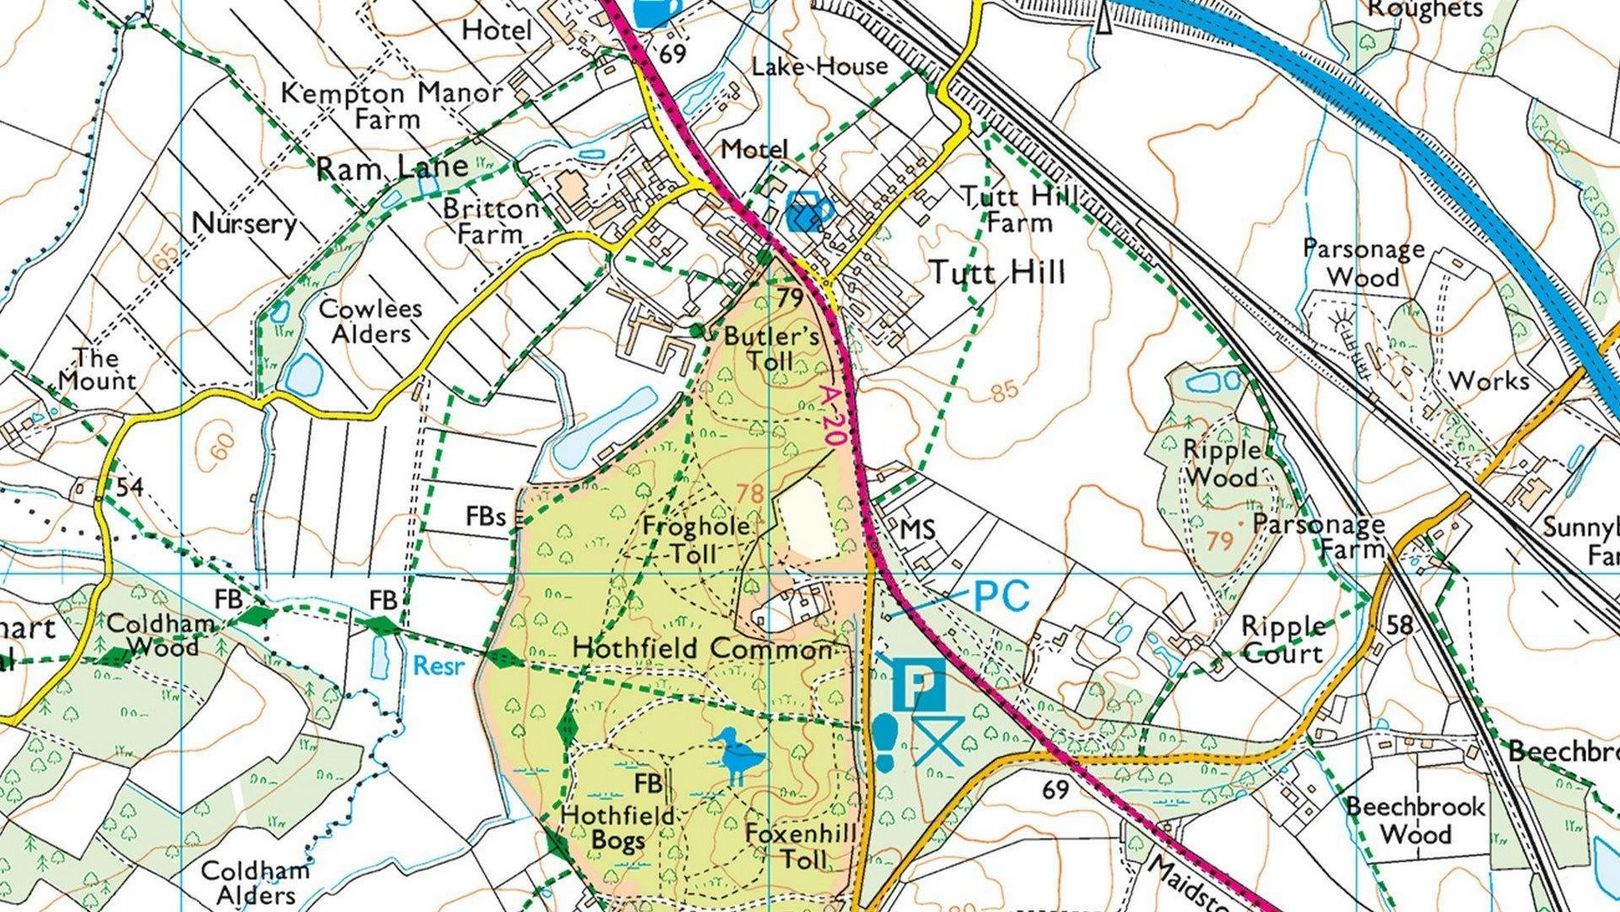
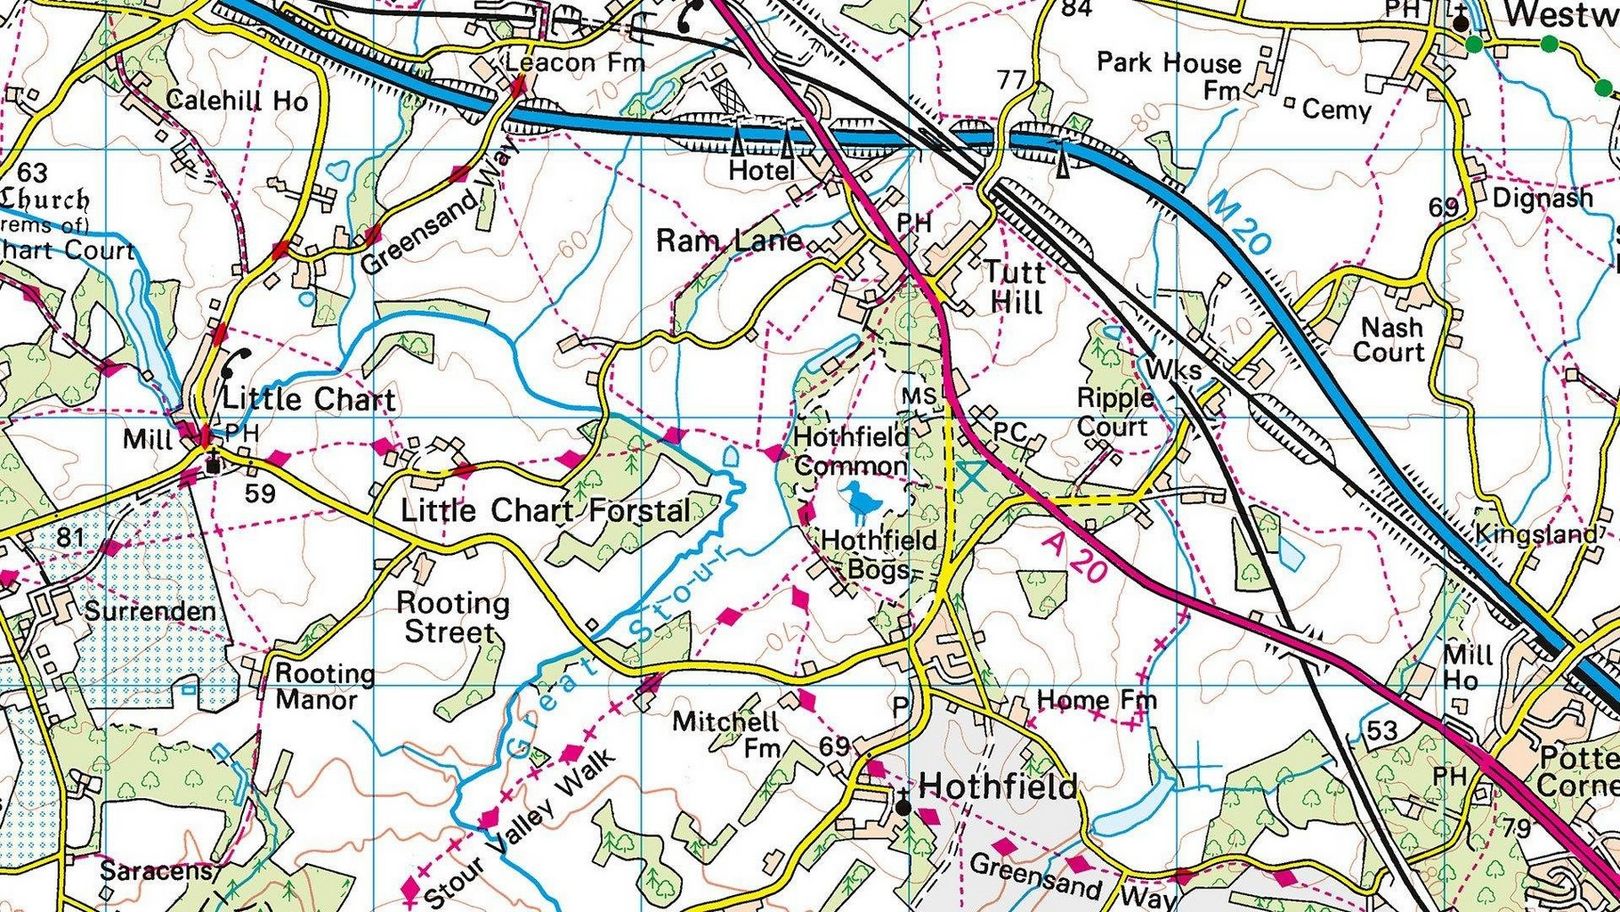
A map is simply a drawing or picture of a landscape or location. Maps usually show the landscape as it would be seen from above, looking directly down. Maps will often show other features such as roads, rivers, buildings, trees and lakes.

Hay Wales Map

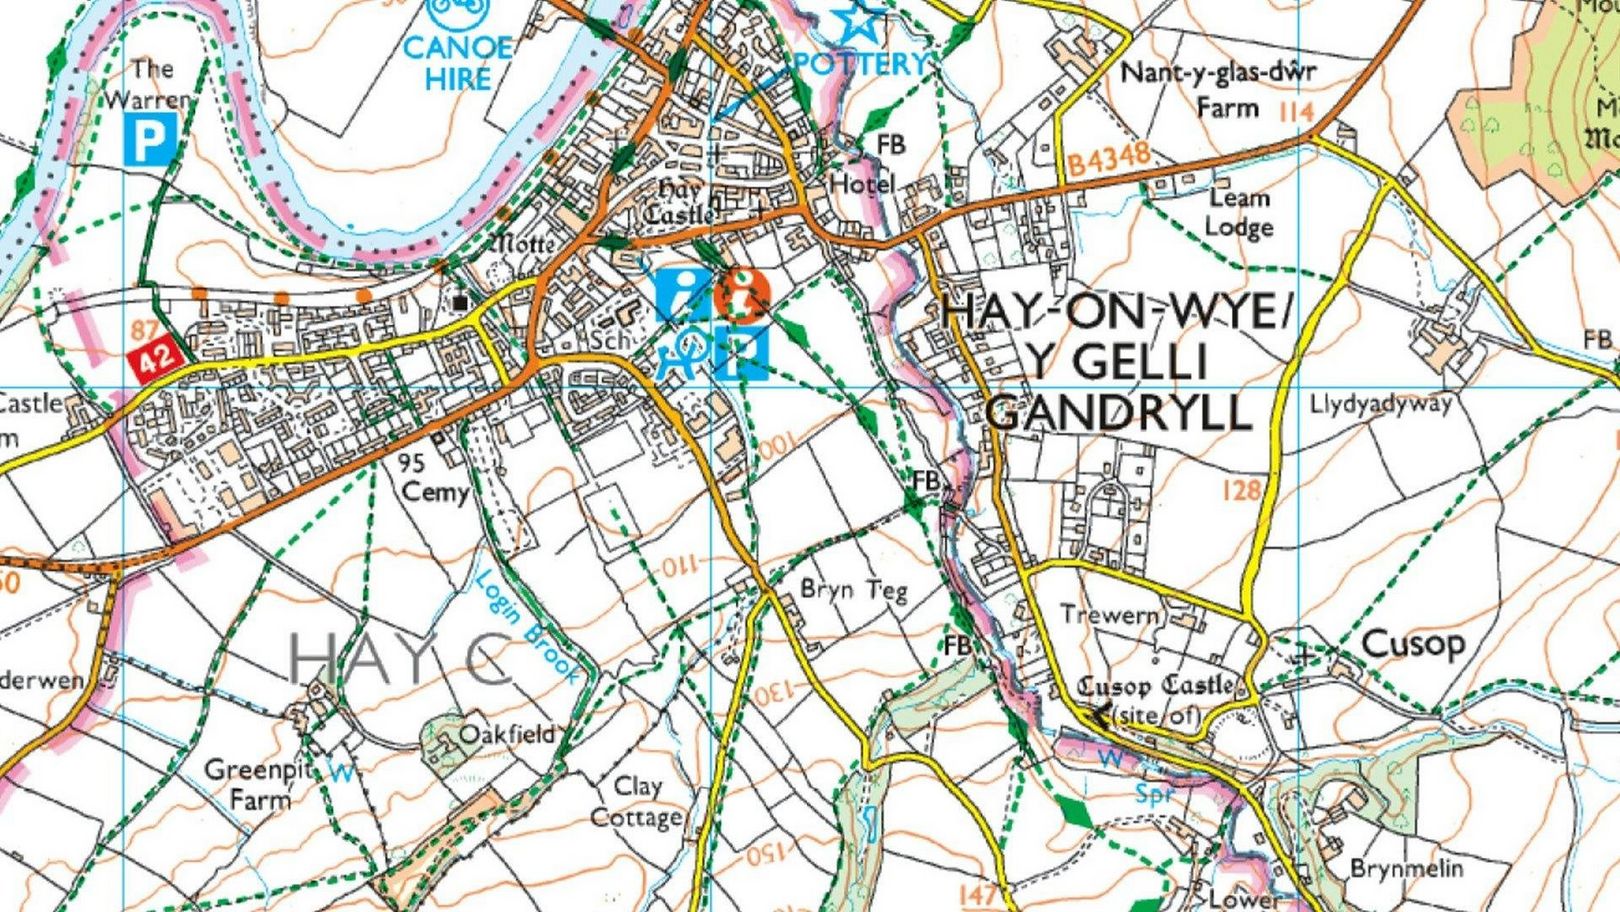
There are many different types of maps, and which one you should choose depends on why you need it. If you were trying to find a certain street or building in your hometown, you would need a map that showed you all the smaller streets, maybe even footpaths in and around town. However, if you were taking on a hill walk in the Peak District or a mountain in the Lake District, you might need a map that shows a bigger area of land and tells you the heights and steepness of the hills and mountains.

Whichever type you choose, there are a few basic features usually found on any map, which we’ll explain below.

Map Symbols

OS Map Symbols

Rather than containing descriptions which can be confusing and take up too much space, maps have symbols to show where certain things are. Above you can see some examples of symbols you will commonly find on an Ordnance Survey map.

Ordnance Survey maps use different shapes, colours and symbols to show all the roads, buildings, rivers and other features of a landscape. They are designed to be simple, with many symbols resembling the features they represent. This makes reading your map easier and quicker so you can get to exploring!

What is a Map Key?

On most Ordnance Survey maps you will find a key, also known as a map legend. This section explains what each symbol on the map represents. If you find something on the map you don’t understand or recognise, the key or legend will help you to identify what it is.

Using a Map Scale

To create an accurate picture of a landscape on paper, everything has to be much, much smaller. This is done by ‘scaling down’ the actual size of the land. The map below shows Great Britain. The size of the island has been ‘scaled down’ so it will fit on this sheet of paper. As a result, the map is too small to contain a lot of detail and doesn’t have many names on it.

Map of Great Britain

Map Features

Roads

Roads are marked in different colours depending on the type of road being shown. For example, thick blue lines on a map represent motorways, while dashed lines indicate an unfenced minor road.

Footpaths

Footpaths are marked on Ordnance Survey maps in various colours. On a 1:25 000 scale OS Explorer map the public rights of way are marked in green and on a 1:50 000 scale OS Landranger map they are marked in magenta. There are various types of public rights of way and public access, so please check the map key for full information. It is important to be aware that footpaths that are shown in black are not necessarily public rights of way.

Woods

Woods are shown in green with a coniferous or non coniferous tree shape printed over the top.

Buildings

Buildings are marked by small brown squares outlined in black. However, some particular buildings have their own special symbols, such as churches and windmills. Any of these buildings can be useful landmarks, helping you to check your position on the map.

Rivers and Streams

Rivers and Streams are shown as blue lines. The width of the line is representative of the watercourse width (if the width of a river is more than 8 metres it is shown as two blue lines with a light blue area between). Rivers and streams can be extremely useful in determining your position on a map.

Scales

Understanding Map Scale

Scale tells you how much the land has been scaled down to fit on the paper. If the scale of a map is 1:50 000 then everything on the map will be 50,000 times smaller than it is in reality. Here's some examples:

1:25 000 scale

Kent Map Scale A

1:50 000 scale

Kent Map Scale B

Your Ordnance Survey map will also contain other features and information beyond these basics that will be explained, along with the features above, in the key of the map.

Navigation

Understanding Map Grid References

Ordnance Survey maps are covered in a series of faint blue lines that make up a grid. The lines have numbers accompanying them that allow you to accurately pinpoint your location on a map. Once you have located where you are, the grid system makes it simple to give others (such as Mountain Rescue) an accurate description of your location. This description, which will be a series of numbers, is known as a grid reference.

Always remember: 'Along the Corridor and Up the Stairs!'

Before you begin to look at grid references it is important to be aware that all the numbers going across the face of the map, for example, left to right, are called eastings (this is because they are heading eastward), and similarly, all the numbers going up the face of the map from bottom to top are called northings (again because they are heading in a northward direction).

Map Grid Reference A

There are two main types of grid reference:

4-figure – for example, 1945, this identifies a single kilometre square on an OS map.

6-figure – for example, 192454, identifies a 100 metre square within a single kilometre square on an OS map.

The Grid reference is always for the bottom left hand corner of the grid square you are in.

4-Figure Map References

When giving a 4 figure grid reference you should always give the eastings number first and the northings number second, very much like when giving the reading of a graph in school – you must go along the corridor (horizontal) and then up the stairs (vertical).

Four Figure Map Reference

For example, the number 2 in the diagram is 19 across and 45 up and therefore the 4 figure grid reference is 1945.

The numbered squares on the diagram would have the following 4 figure grid references: 1 = 1845 2 = 1945 3 = 1844 4 = 1944

6-Figure Map References

Having worked out the basic 4 figure grid reference, for example, square 3 above, imagine this square is further divided up into tenths. Using the example right, the blue box is in the square 1844. More accurately, it is 7 tenths across and 8 tenths up within the grid square 1844 and therefore has the 6 figure map reference 187448.

The shapes on the diagram would have the following 6 figure grid references:

▇ = 187448 ⬤ = 185443

Six Figure Map Reference

What are National Grid Lines?

As well as numbered grid lines, OS maps have a two letter prefix. The two letter prefixes can be found printed in faint blue capital letters on Ordnance Survey maps. The whole of Great Britain is divided into squares of 100km and each square is given two letters. In your map’s key there will be a diagram, showing you which areas of your map fall into different squares of the National Grid.

When you quote your grid reference you should put the two letter prefix of the area you are in before the numbers. This means that there is no doubt or confusion about your location. For example, you may be at grid reference 509582 in south west Scotland.

The complete grid reference you should quote would be NX 509582 (without the letters the numeric reference would be repeated in every 100km square).

Map National Grid Lines

Contours

How to Read Map Contour Lines

Understanding the shape of the land by looking at a map is a very useful skill and can be essential if you’re going to be walking in mountainous terrain. The height and shape of the land is shown on a map using ‘contour lines’. These lines appear as thin orange or brown lines with numbers on them. The number tells you the height above sea level of that line.

A contour line is drawn between points of equal height, so any single contour line will be at the same height all the way along its length. The height difference between separate contour lines is normally 10 metres, but it will be 5 metres in flatter areas. The map key will tell you the contour interval used on your map.

Map Contour Diagram

The picture shown illustrates how a landscape can be converted into contour lines on a map. An easy way to understand and visualise contour lines is to think of them as high tide lines that would be left by the sea. As the water level drops it would leave a line every 10 metres on the landscape. These marks would be contour lines.

The picture below shows how contour lines can be used on maps to describe different landscapes. Even though all the lines look similar at first, they are describing very different landscape features. The closer together the contour lines, the steeper the slope of the hill. If a hill is very steep the contour lines might even merge into each other.

A spur is a ‘V’ shaped hill that juts out. A simple way to tell a valley from a spur when looking at contour lines is to remember that if the ‘V’ points uphill it’s a valley, if it points downhill it’s a spur.

Map Contour Lines

Compass

Orientating your Map by Eyesight

As an alternative to using a compass to orientate your map, you can use your eyesight. This method can be great fun and good practice with the kids but will only work if you are in an area with visible prominent features or landmarks. First, locate yourself next to a feature or landmark and place your finger on the map at the point where you are standing. Then begin to rotate the map so that other features and landmarks on the map begin to line up with the actual ones you can see. The map is now orientated with the land, although not as accurately as it would be using a compass.

Know how to orientate using a compass by heading to our guide: Knowing your Compass with Ordnance Survey

Millets' Top Tips for Outdoor Adventures

Pre-plan Your Mapped Route

Whether it’s your first adventure with a map and compass, or you’re a seasoned walker, plotting your route beforehand is key. We recommend choosing a short or familiar route if you’re just starting out.

Take the Right Gear

At Millets we’ve been ‘getting people outdoors since 1893’ and so we know the importance of having the right gear; especially when it comes to the unpredictable British weather. Now you don’t need to spend a small fortune when kitting yourself and the family out for an adventure, but there are some suitable staples we suggest.

List of Essentials for Walking

Tell Somewhere Where You’re Headed

Before setting it, be sure to let someone know where you’re going, or even better, bring them along. It’s also a good idea to let them know when you’ll likely be back, and have a fully charged mobile phone. Before attempting any walk, make sure you’re confident in your navigational skills by practicing on familiar routes.

Know the Countryside Code

The British countryside is ours to explore; but it is also ours to protect and respect. The Countryside Code and ‘Leave No Trace’ principles keep our natural spaces safe. Click to Learn More.

Get Great Outdoor Inspiration

So you have the skills but don’t know where to start? We’ve collected the best of Britain which is made for adventure to inspire and excite you. Check out our Adventure Finder Guides today to get started!

Millets Help

Sorry to hear that you are having an issue. For us to help you further please quote the following to our customer care team.

peopleCustomer Care Hub emailEmail phonePhone